What is Cucumber?
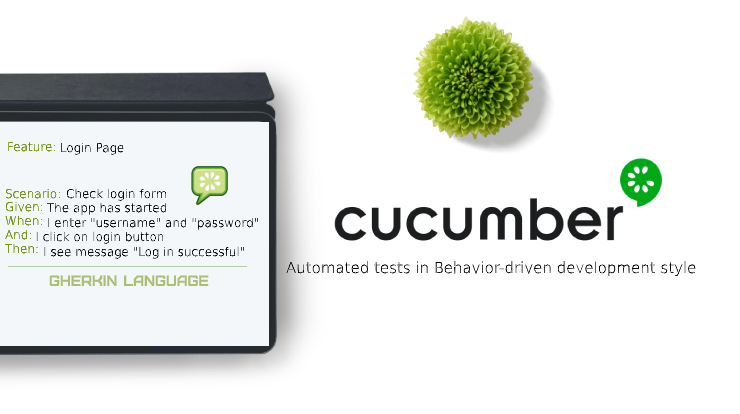
Cucumber is a test framework that is used for writing BDD tests for web applications in a simple English language text called Gherkin. Tests written in Cucumber can be easily read by everyone within the team whether technical or non-technical individuals. It provides some form of live test documentation that is updated regularly but in the background, there are methods that are mapped and executed with each Gherkin sentence.
When BDD comes into the picture, Cucumber is in the central point of it because it supports the behavioral driven development approach for more structured and easily readable automation tests.
It’s easy to use, and apply to the project and it can be integrated with various other tools and frameworks, no matter if you’re performing API or UI tests.
How it works?

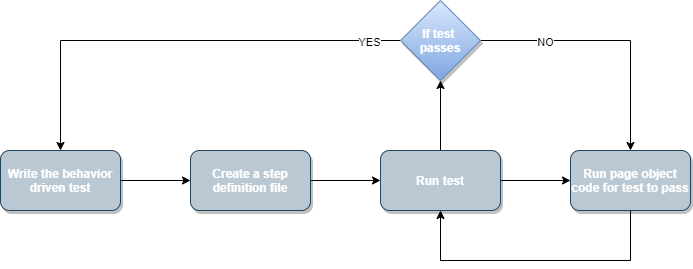
There are a couple of test structure “layers” that needs to be created in order for the tests to work correctly. First, you need to write a plain Gherkin test scenario in a feature file containing GIVEN, WHEN, THEN format. This is the BDD approach implemented for the purpose of writing automated tests. It explains what is the name of the scenario, what the test needs to have as preconditions, what are the actions of the test, and the output of those actions. One test can have multiple preconditions, actions, and results and that can be achieved with the keyword AND. Second, you need to create the step definition file.
This file connects the feature file and the page-object methods. In one line of code, you can have the same sentence from the feature file mapped (usually regex) with a method from the page object file. Last but not least, a page object file with all the methods that interact with the application and are mapped to every sentence from the feature file, The methods can be written in different frameworks.
Advantages
There are many advantages Cucumber offers:
- Support multiple languages like Java, Ruby .NET, etc.
- Code reusability and readability
- Every person can create the test case in Cucumber
- E2E test framework
- Allows non-technical individuals to be involved in writing the test script
Cucumber Features

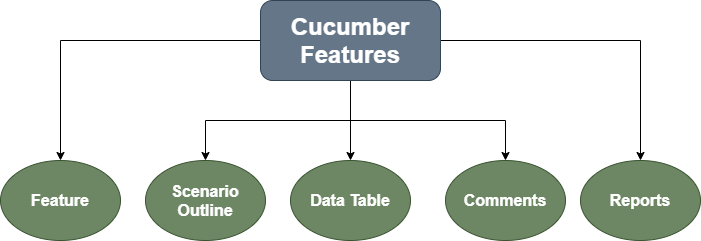
Once incorporating Cucumber into your testing framework you’ll get the chance to work with the powerful features that Cucumber offers. I will mention some of the most important ones.
Feature
The Feature keyword is defined as a functionality or a service within the project. The preferred approach is dividing multiple smaller features from one big functionality and work on them till they’re fully covered.
One example of a feature is:
Feature: User fills out the form and signs up
That feature can be saved in a feature file called: userSignUp.feature.
One feature can have the following keywords:
- Description – Feature description
- Scenario – One test scenario for that feature
- Given – Preconditions for the test to be able to achieve the result
- When – Test actions that the test needs to perform
- Then – Outcome of the test actions
- And – Can be added after the keywords if we have multiple preconditions, actions, or results
One example of a feature with it’s keywords:
Feature: User fills out the form and signs up
Description: User navigates to the SignUp page, fills out the form with valid input data, clicks on sign up button and signs up successfully
Scenario: User fills out the form Given: The user is navigated to the SignUp page When: The user fills out the whole form with valid data And: The user click on SignUp button Then: The user successfuly register to the website
Scenario Outline
Scenario Outline is a keyword where it replaces the variables defined in the test with the values provided from the feature file. It is used when we have multiple scenarios with the same preconditions, actions, and outcomes but different input values. Let’s see an example.
Scenario Outline: I will prepare different food every day
Given: I open the fridge When I pick up the "<ingredient>" Then I will prepare "<food>"
Examples: | ingredients | food | | Meat | Sandwich | | Vegetables | Salad |
From the example above you can notice that we have a table defined with “ | ” and two variables: ingredients and food. They are used in the scenario above by providing two different row values (Meat, Sandwich) and (Vegetables and Salad) respectively.
When we have all the page object methods in place, the test will be executed twice, once for the first set of input values and for the second input values from the table row. With “<>” we can pass values in the scenario. Cucumber sees that the ingredients and food are variables that have multiple values. When the test flow arrives at those variables Cucumber replaces the variables with the provided table values which and proceeds with the test execution.
Data Tables
Data Tables are useful when we have different scenarios with different needs.
Lets see and example.
| Fields         | Values              |
| First Name     | Jack                |
| Last Name      | Smith               |
| Email Address  | jack_smith@test.com |
In the step definition file we can initialize the data table and get each raw:
public void dataTableExample(DataTable table) {
List<list> data = table.raw();
driver.findElement(By.name("firstname")).sendKeys(data.get(1).get(1));
}
With this, we are getting the specific values from the raws and use them for our purpose which can reduce the time of having repeatable tests and longer test execution.
Comments
Comments are defined like:
#This is a comment for the scenario Given: I open the fridge When I pick up the "<ingredient>" Then I will prepare "<food>"
It’s a piece of code that is not meant for execution just for explanation and additional documentation purposes. Comments can be added anywhere in the feature file.
Reports
Reports can be generated with the following code:
@RunWith(Cucumber.class)
@Cucumber.Options(
   format = {"pretty", "html:target/localpath"} )
After execution, a report in HTML format will be generated in the path provided. The result will consist of all the tests whether they pass or fail.
Example
By now you probably have a general idea of what Cucumber offers as far as automation tests go. Now, I will show you a simple example of how one test using Cucumber BDD based on Typescript looks like.
So, putting all together:
feature file
Feature: User fills out the form and signs up
Description: User navigates to the SignUp page, fills out the form with valid input data, clicks on sign up button and signs up successfully
Scenario: User fills out the form Given: The user is navigated to the SignUp page When: The user fills out the whole form with valid data And: The user click on SignUp button Then: The user successfuly register to the website
step-definition file
import { binding, given, then, when} from 'cucumber-tsflow';
import pageObject from "../pageObject"
Given("The user is navigated to the SignUp page", pageObject.navigateToPage);
When("The user fills out the whole form with valid data", pageObject.fillOutTheForm);
And("The user click on SignUp button", pageObject.clickOnButton);
Then("The user successfuly register to the website", pageObject.displaySuccessMessage);
page-object file
public async navigateToPage() {
await browser.get("www.test-test.com");
}
public async fillOutTheForm() {
await locatorElementOne.sendKeys("Name", "User Name", "Email");
}
public async clickOnButton(): Promise {
await locatorElementTwo.click();
}
public async displaySuccessMessage() {
expect(locatorElementThree.getText().toEqual("Successful Sign Up!")
}
As you can see we have three files, feature file when we define the feature as well as a scenario for that feature, step-definition file where we map every sentence from the scenario with a different method, and page-object where the actual application interaction happens.
Happy automating!
Share This Post
Latest Posts
- Test Analyst’s Responsibilities in Risk-Based Testing
- Crucial Aspects Of Superior Test Code Quality
- Streamline Your Cucumber BDD Tests with Gherkin Lint: A Comprehensive Guide
- How to Test Authentication and Authorization with Confidence + Best Tips
- Exploring the Three Scrum Artifacts: Grasping Their Essence and Effective Utilization


