
More and more organizations today adopt DevOps practices at early stages. CI/CD pipelines have been an essential part of the SDLC(Software Development Lifecycle) as well as STLC. To goal is to identify bugs as early as possible in the development phase, resulting in more efficient and reliable software products as a result. One of the most important steps one team can do when it comes to CI/CD is integrating your tests in an automated build process, whether those tests are UI tests Selenium-based, or API tests using a library like Rest Assured.
In this post, I’ll show you how to connect your GitHub tests with Jenkins in 5 simple steps.
Step 1: Jenkins installation
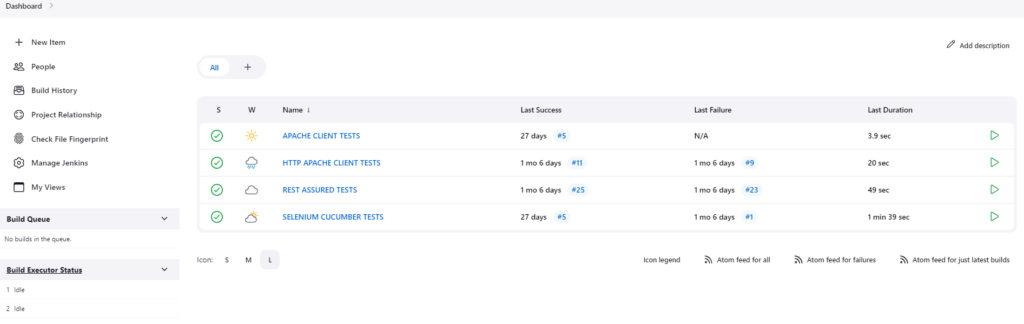
As a first step, you need to install Jenkins locally on your machine. Download the latest version from here to get started. Download the specific package based on your operating system and start the installation wizard. Once you have installed Jenkins open your browser and navigate to http://localhost:8080 you will see the Jenkins dashboard where you can create a new job, see all the users, and the build history as well as check all the builds associated with the user.
Step 2: GitHub plugin installation
The next step towards integrating your GitHub tests with Jenkins is the GitHub plugin installation. This is the part where the integration occurs. To install the plugin go to the dashboard and click on “Manage Jenkins -> Manage Plugins -> Available Plugins”. Try searching the “GitHub Plugin”, install it, and restart Jenkins(by closing the tab and opening it again)

Step 3: Jenkins job creation
Now you are ready to create your first Jenkins job. To create one click on “New Item” on your Jenkins dashboard, choose “Freestyle project”, give it a name and that’s it, the job is created! But the job is pretty much worthless if you don’t configure it accordingly right?
In the “General” section choose “GitHub project”. Under “Source Code Management” select “Git” and enter the repository URL where your automated tests are stored as well as the credentials(if needed) to access those tests. elect your preferred build triggers like:
- Build after the project is built
- Build periodically
- GitHub hook trigger
If you want you can skip this part and go straight to the build step where you can add a new one. For example, if your tests can be executed using the Windows terminal you can select “Add build step -> Execute Windows batch command” and then type in the command that will be executed once the job is started. You can also select various different types of build environment-related configurations like:
- Deleting workspace before build
- Adding timestamps in the console output
- Terminate the build if it gets stuck
You can also add a post-build action like archiving the reports, sending email notifications of finished builds, adding a Git commit option, building other projects once this is done, etc.
Step 4: GitHub webhook
This part here is needed if you want Jenkins to be notified automatically when a change is made in your Git repository. What you need to do is you need to add a webhook in your Git repository. You can do that by navigating through “Settings” and clicking on “Webhooks”. Add a new webhook and provide the Jenkins URL and application/json as a content type. This way if you make changes to any of the files within this repository Jenkins will be notified and will trigger a new build.
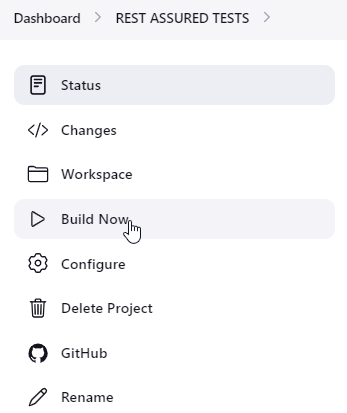
Step 5: Run the Jenkins build
The final step is executing the tests through Jenkins to see that it works. Of course, you can either make a change to your Git repo or you can trigger a build manually right away. Let’s take a look at how to start a build manually in Jenkins.
Execute the GitHub tests with Jenkins
To start a new build just navigate to your project and click “Build Now”.
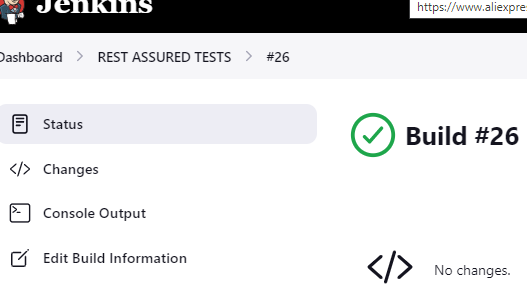
As you can see the build passed successfully and you can see the details of the execution once you select “Console Output”.
Conclusion
In conclusion, integrating your GitHub tests with Jenkins can help you catch bugs early in the development cycle, resulting in more efficient and reliable software delivery. By following these 5 simple steps, you can easily set up this integration and start reaping the benefits of continuous integration.
Interested to learn more about automating tests using Selenium? Enroll Now for Selenium Certification Training By Edureka and increase your chances to get hired by Top Tech Companies.