
Postman is a very popular software tool that allows you to make API requests to connect to your working APIs. You can create simple or complex HTTP requests that can create, retrieve, delete, or update data. It is a very elegant way to test your API and it gives accurate results regarding the quality of your application.
What is API request and API testing?
Before we dive into how to use Postman to create simple API requests we must go through what is an API request first and what is meant by API testing in general.
What is API request?
API request is when you make a call to a server using API. Simply said, it’s a messenger that delivers your request to the provider and then delivers the response back to you from the source you are requesting it.
What is API testing?
By making an API calls we are actually testing our application and it’s internal communication. That type of testing is called API Testing. It’s basically a collection of positive and negative scenarios (requests) that ensure testing our application for errors and verifies that we have the right functionality implementation. Postman does all of that in a very easy way.
How to use Postman?
We’re going to go through a step-by-step process on how to get Postman, how to configure it, and how to create a simple API request. The first thing you need to do is go to the official Postman website and download the tool. Once you’ve downloaded and installed the tool you can start creating your request.
This is the initial view that you are going to see when opening Postman for the first time. As you notice the workplace is divided into initial header, footer, and two columns:
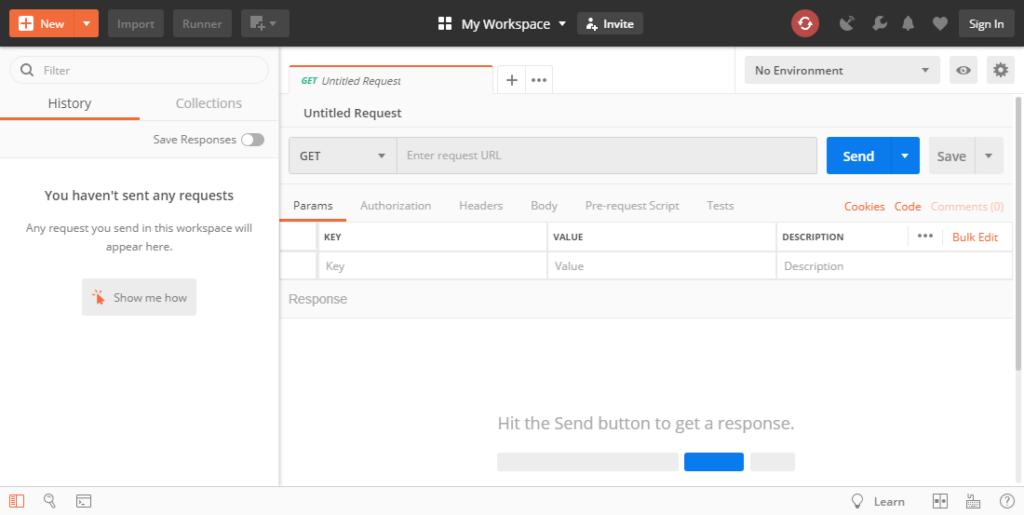
The header includes creating a new or import and existing request, collection of requests, environment, etc. Also, you can open the runner where you can see the last test execution with the actual result and you can sync all your requests across multiple devices that you are working with.

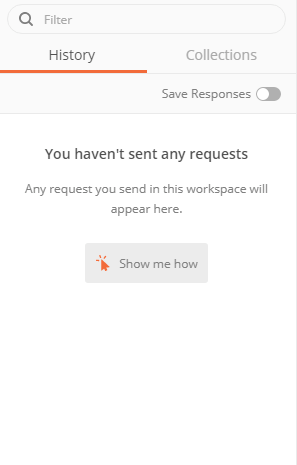
The first column (left panel) consists of a collection of requests that you’ve created as well as the history of the executed API requests. You can search for requests, save responses, delete, rename, duplicate or modify requests, etc.
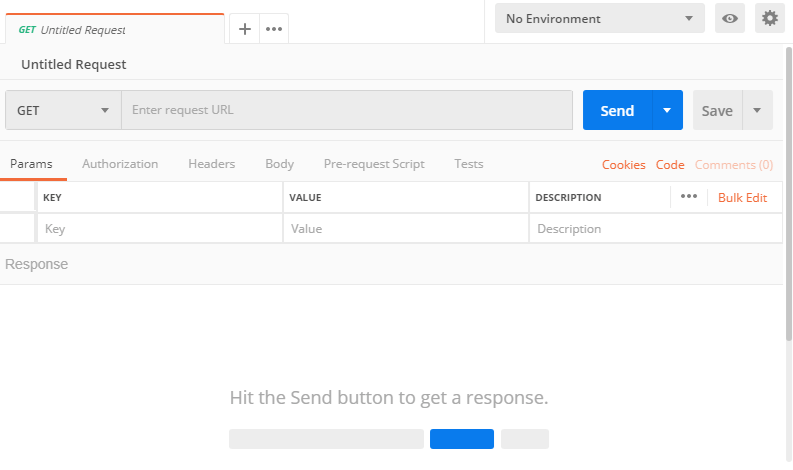
The second column (right panel) is the actual request we are working on. Here you can see the HTTP methods available (GET, POST, PUT, PATCH, DELETE, etc.), the request URL, send and save request buttons, query params that we want to store, authorization method (if we have any), request headers that are part of the call, request body that can be consisted of plain Text, Javascript, JSON, HTML or XML, pre-request scripts if we want something to be executed before we make the request and tests that are executed after our request is done.
Creating your first request
We are going to create our first requests. In order to do that we need to configure the API URL that we want to target together with additional parameters that are needed for successful API requests.
GET Request
GET request is used to retrieve data from the requested URL. Few things need to be in place when creating the request. First, we specify the HTTP GET method.
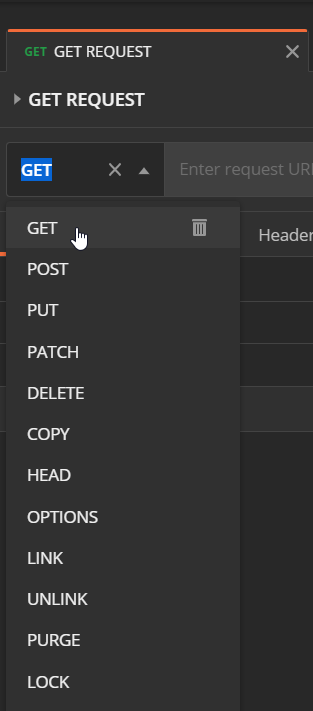
Then we need to specify the requested URL to point at. As an example we’re going to take the https://jsonplaceholder.typicode.com/users URL to practice sending API requests. Here we are going to list users and their information. Paste the URL into the requested URL field.

The last thing to do here is to check if the auto-generated headers are applied.
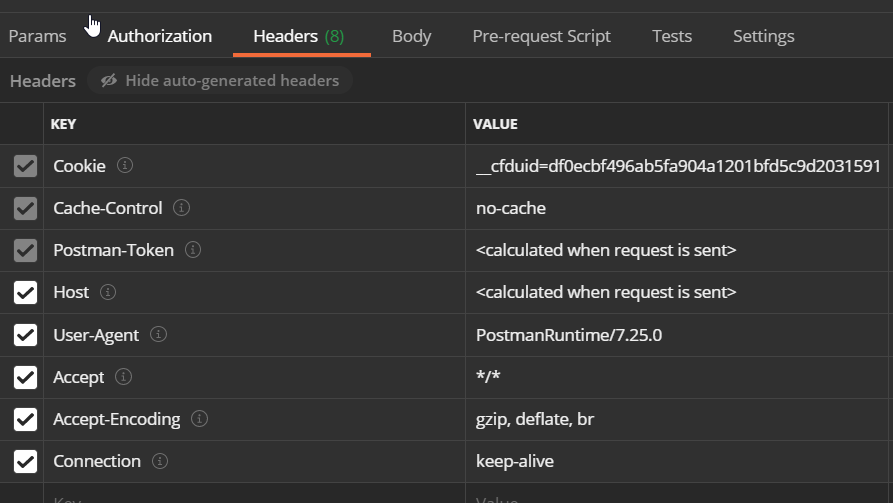
Now is safe to say that we have everything we need in order to send a successful GET request. On pressing the Send button we get the response from the provider which in this case is https://jsonplaceholder.typicode.com and the endpoint that we are targeting our GET request is /users.
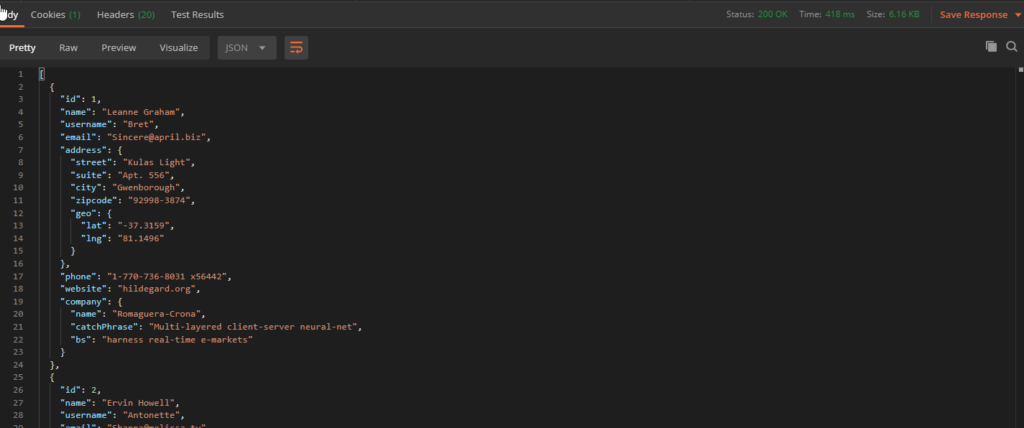
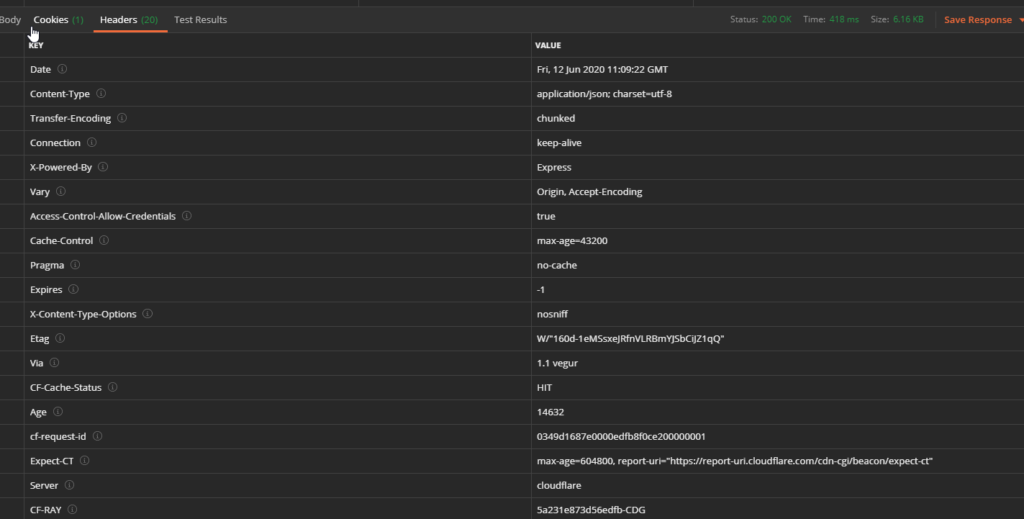
Noticed that the HTTP status code is 200 OK which indicated that the requests successfully passed. The response body in the form of a JSON format is returned from the endpoint. It contains a list of users and their information like name, username, email, address, phone, website. Response headers tab contains important information like the date when this request was sent, the content type of the returned response, what is the server that handles these requests, etc.
What if we want to get information only for the second user. Then we need to set the query parameter in the requested URL in order to get the correct response. Go to Params tab under the Key header type ‘id’ and Value header enter ‘2’. Send the request.
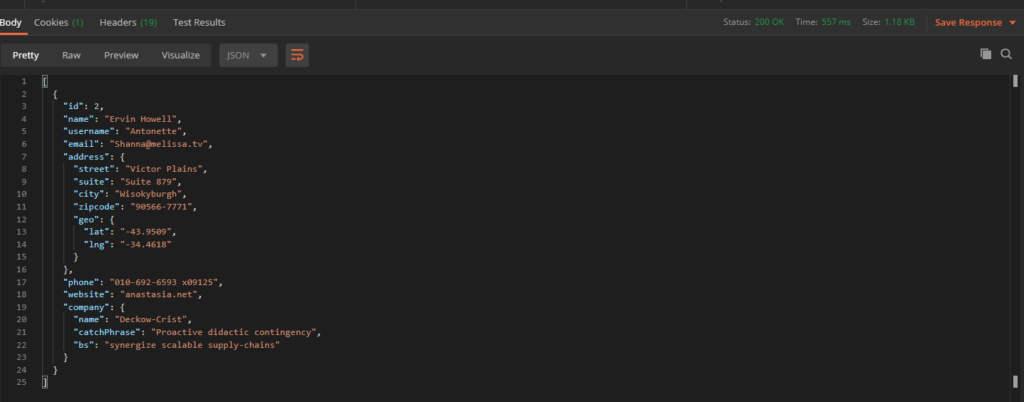
As you can see we get a successful response that contains information for the user with id = 2 only. We can have as many query params as we can develop in our API.
POST Request
POST requests are used when we want to add some data to the application using the specified endpoint. We are going to use the same data format from the previous GET request but we are going to change the id key (this is a unique per user so we must change it) and maybe the user name to differentiate from the other users on the list.
Change the HTTP method to POST. Depending on the API development, the same or different endpoints can be used for getting and adding data. In this case, the same URL is used for getting and adding data in the application. Copy the previously returned JSON response, change the id = 100 and change the name = “Test User”. Go to the body and select raw button to paste the modified JSON body there and select JSON type on the right dropdown,
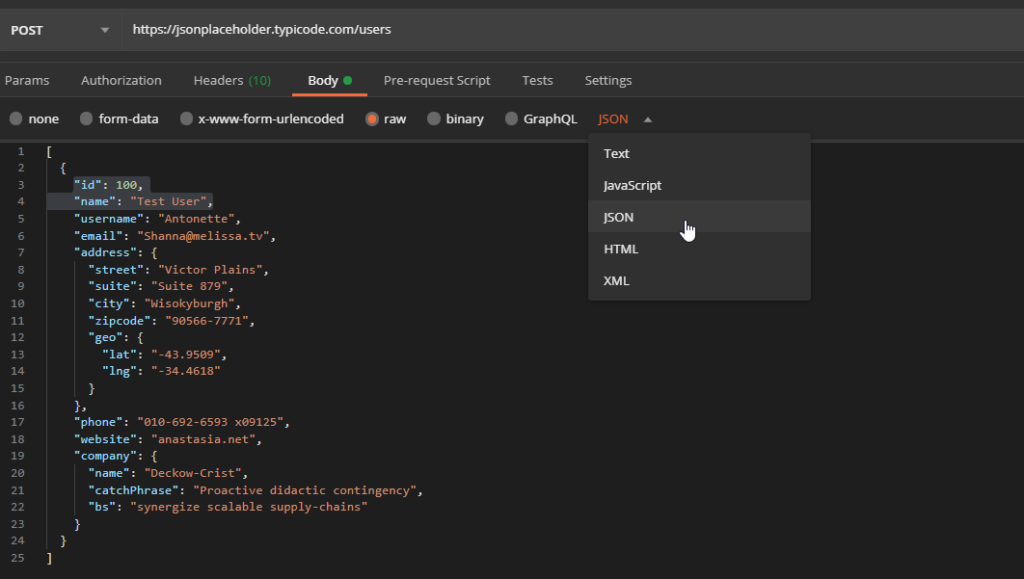
Fire up the request and see what’s happening. You can see that we are getting status code 201 Created which tells us that the request has passed and the resource is created. The JSON response body for our user is also returned.
DELETE Request
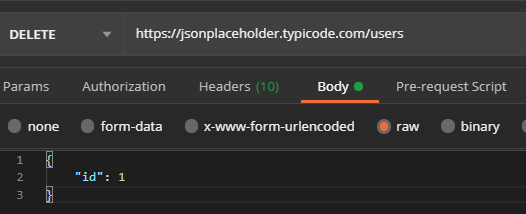
The DELETE request depends on how the API is developed. We can have a DELETE request without the body, but the query parameter indicates what resource to be deleted or with a body that includes the unique key of the resource we want to delete. For example, if we want to delete the first user with id = 1, we can set the request like this:

or by sending a JSON body with the id of that user:
Parameterized requests
Sometimes we have large API’s that have authentication credentials or token to access their data. Or maybe we have some query parameter that is used on multiple endpoints with different values. We must set the parameter on every endpoint and should constantly change its value which can be an overhead. That is why parameterized requests come into play. We can set and environment which consists of a set of variables that allow us to switch the context of the request and use the same variables for all endpoints.
Go to manage the environments button (upper right corner) and add the environment. Once you’ve created an environment add the id in the key header and the value of the id which in this case is 1.

Now go back to the GET request and change the URL’s query parameter to take the variables’ value that you had stored previously.

Send the request and you will get the same response as the previous GET request we’ve sent. This is really helpful because if that parameter is used in many endpoints, it allows the user to only change the value of the parameter in one place instead of changing it on all endpoints.
Test scripts
Using JavaScript test script in Postman helps verify the response that is return whether if it’s successful or failed. Let’s explain this with an example. Go to the Tests tab and paste the code snippets below:
tests["Status code is 200"] = responseCode.code ===200;tests["Status code is 200"] = responseCode.code ===200;
tests["Response time is less than 200ms"] = responseTime < 200;
tests["The Content-Type is JSON"] = postman.getResponseHeader("Content-Type") === "application/json; charset=utf-8";

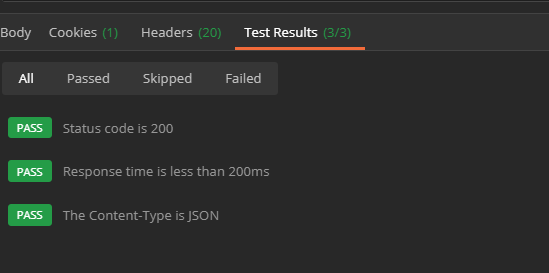
This will check if the status code is 200, the response time is less than 200ms and that the content type is of JSON form. All these results are shown under the Test Results tab. You can check many things from the response body and header so feel free to practice.
Conclusion
Many organizations use Postman since it is one of the most popular tools for API requests. It has a very simple user interface, it’s easy to use, can be integrated with third-party tools, can create a custom verification of responses, parameterize requests, for complex APIs with many endpoints, can be used as a manual or automated software tool, etc. All these features can be of a huge benefit to the organization’s application under test and the end result would definitely be different when applying this tool in the SDLC or STLC.
Share this page


