Visual automation testing ensures that any change in the application that results in a different screen from the one that has been set as a baseline is tested and reported as an issue. It is a form of regression testing where screens are being saved from the application. Then these screenshots are compared with the saved ones and if any difference occurs, then an issue will be reported to the engineer.
Today we’re going in-depth into the visual automation world by examining the software tool called Aplitools, how it works, and how to use it. Let’s start!
What is Aplitools?

Applitools is an E2E software testing tool for detecting visual bugs that functional tests miss. It is a powerful engine for automated visual testing, monitoring, and reporting. Founded by software developers with a mission on reducing and easing the release process for the application. Emulation of the human eye and brain converted into algorithms that analyze the page and report differences as a human eye would. Compatible with almost all popular automation frameworks and programming languages. It has a large storage server for saving screenshots, a modern UI for inspecting the test results and potential differences, and easy integration with CI systems.
How it works?
With it’s visual AI engine for automated testing and monitoring, Applitools Eyes allows you to scan screens and analyze them for any differences like a real human eye would but with the power of a machine. It is different from the other visual automation tools since it’s not comparing the screens by pixels. Comparing screens by pixel will give you many false positives on different browsers or devices. Applitools ignores them fully and compares the real screen differences that matter.
Initial prerequisites
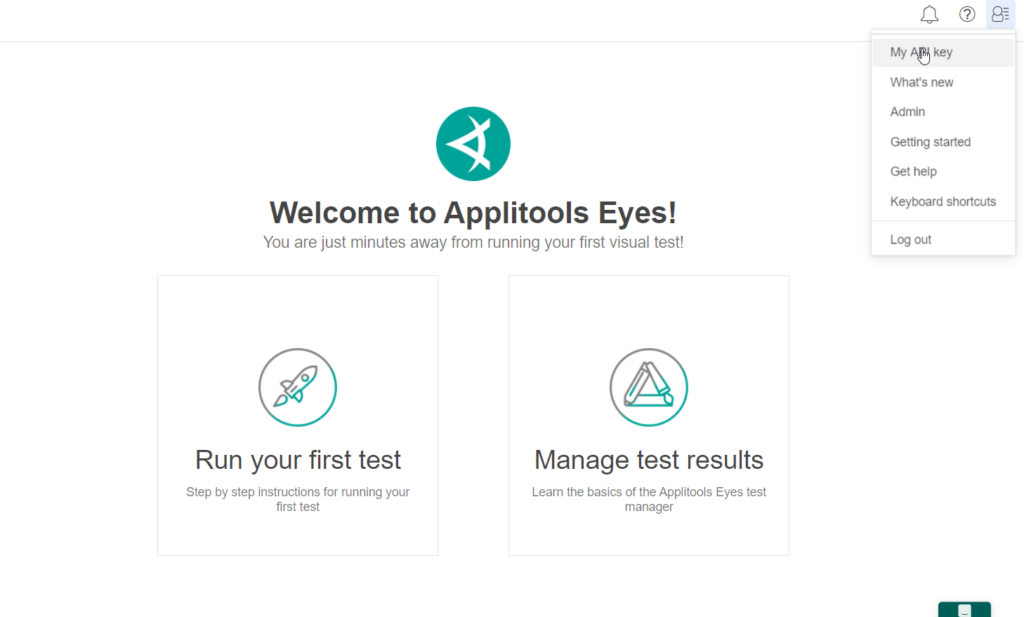
The first thing you need to do is you need to create an account because you will need the API key which Applitools will provide to you once registered. After registering, click on the upper-right button -> My API Key. Once you’ve copied the API key, set it as an environment variable.
Install the NODE(if you are using Applitools with Javascript / Protractor implementation) from www.nodejs.org, google chrome browser, and Chrome Driver.
Creating a Baseline Image
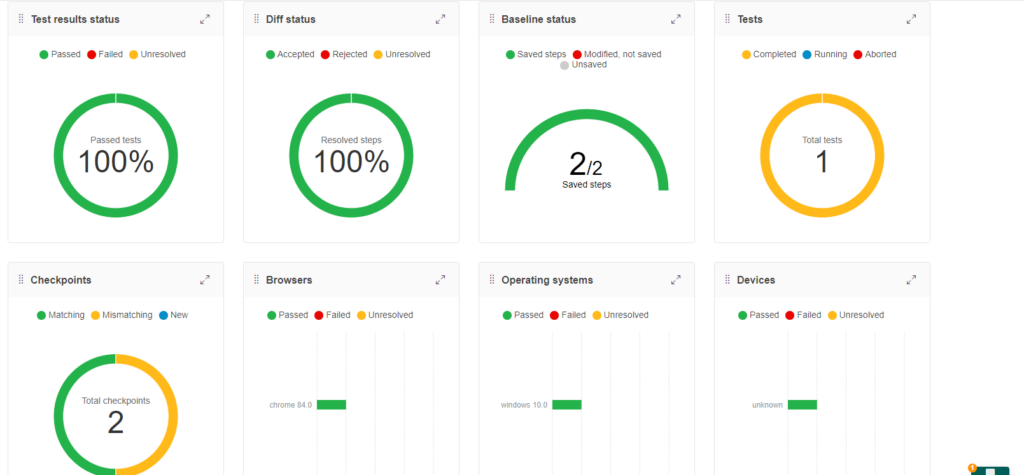
When you run the test for the first time, Applitools will store the screenshots on its server and they will be automatically set as baselines as shown on the image below. There are a couple of options on the Applitools dashboard like select specific tests, a different view of the screenshots like summary, details or steps view, filter test results by several criteria, etc.
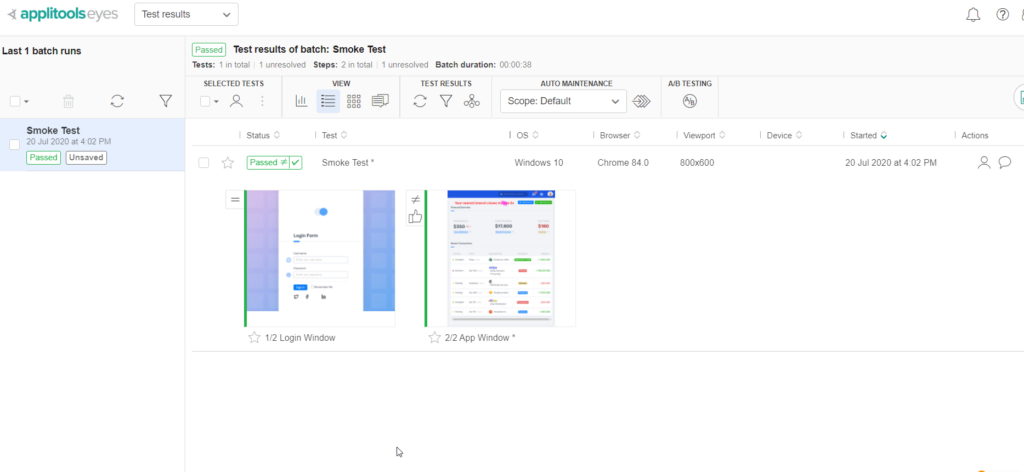
If you set the results to view Batch Summary, for example, you can notice that it has a beautiful representation of the executed tests, potential differences, browser and device statistics, etc.
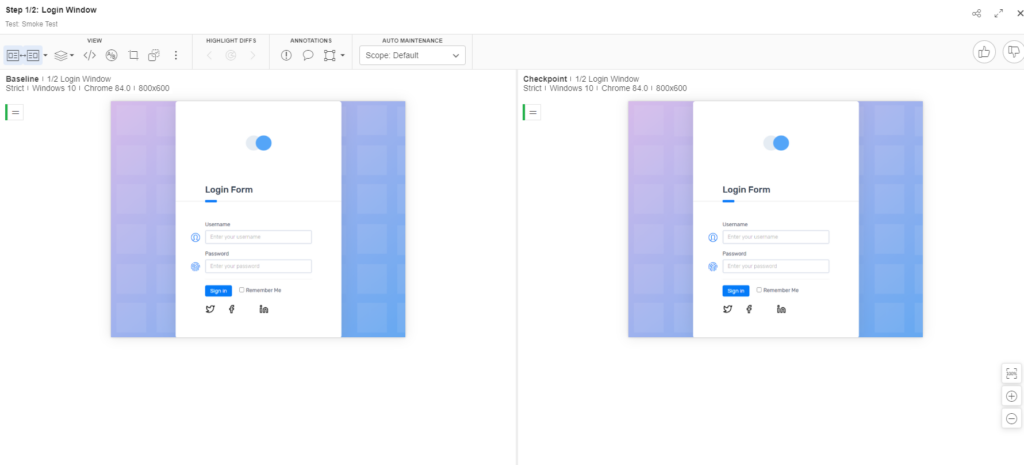
Checkpoint vs Baseline screens – Pass/Fail
When executing the same test again you can see the successful result as seen in the image below. Applitools compares the previously set baseline image with the currently saved screenshot called Checkpoint. There are no differences and as a result, the test is successfully passed.
If for some reason there are differences comparing the screenshots, then something is either changed in the checkpoint screenshot or maybe new functionality is added to the application. In both cases, we need to analyze if those changes are made by requirements and if so, then our new checkpoint images are now our new baselines.
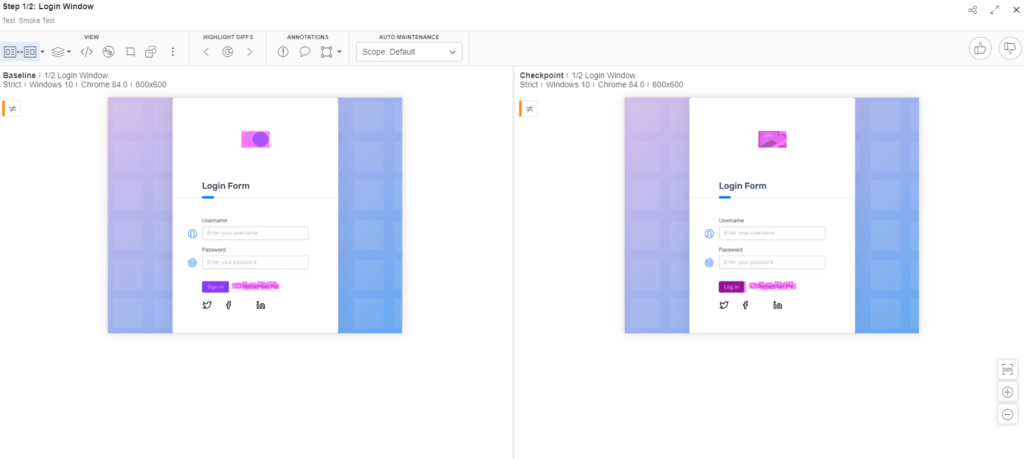
By default, when comparing the screenshots, Applitools will mark the second run as Unresolved until we manually approve or reject the new screen compare to the baseline. We set the new screenshots as Baselines on clicking the upper-right thumb button. With that, we approve our new screenshots and the same screen will be used for future comparisons. If there are differences that shouldn’t be there then, by pressing the thumbs down button we reject the new screen and we keep the old screen as a baseline.


Reporting Issues
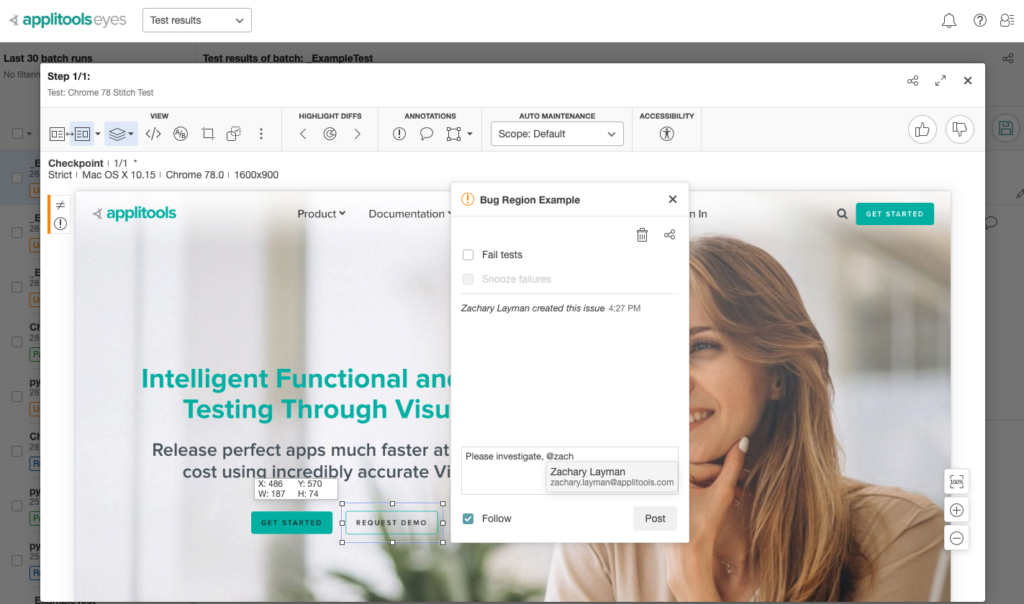
If there are differences in the screens we can report issues directly on the screens itself. Select a specific section of the image and directly report a bug on a test management tool like JIRA. There is no need to manually taking a screenshot and pasting in on a ticket.
To report a bug you need to follow these steps:
- Click on the exclamation mark
- Drag the mouse to the issue region
- Insert a title for the bug
- Click on the Create button

Execute tests
There are two options to execute the tests, either you opt for Ultrafast GRID execution or a simple local execution. We’re not going to go into details about the Ultrafast GRID execution since it is a paid feature and yes, it has many advantages than the local execution but since this is a beginners guide, with the purpose of sharing the basic information about visual automation, we will focus only on the local execution. In order to execute the test, you must have a repository where you need to write code, install dependencies, and configure the test. Let’s take one Jasmine / Protractor example to better understand how to achieve this.
Visual Automation Example
Clone this repo:
git clone https://github.com/applitools/tutorial-protractor-basic.gitNavigate to the folder and run this command to download the needed modules and dependencies:
npm installIf you have an existing project, all you need to do is install the dependency by runing this command:
npm install "@applitools/eyes-protractor" --save-devLet’s look at the example code.
'use strict';

const { Eyes, ClassicRunner, Target, RectangleSize, Configuration, BatchInfo} = require('@applitools/eyes-protractor');

const runner = new ClassicRunner(); // Initialize the Runner
const eyes = new Eyes(runner); // Initialize the Eyes SDK
const conf = new Configuration(); // Initialize the Configuration

describe('This is a simple test', function () {
  beforeAll(() => {
    browser.waitForAngularEnabled(false);
  })

  beforeEach(async () => {
    // Get the API key from your Applitools account
    conf.setApiKey('APPLITOOLS_API_KEY');

    // Set the Batch name of the test
    conf.setBatch(new BatchInfo("This is a simple batch"));

    // Set the configuration to eyes
    eyes.setConfiguration(conf);
  });

  it('Simple Smoke Test', async () => {
    //
    await eyes.open(browser, 'Demo App', 'Smoke Test', new RectangleSize(1280, 720));

    // Navigate the browser to tApplitools page.
    browser.get("https://applitools.com");

    // Store the screenshots by using the check() method
    await eyes.check("App Window", Target.window().fully());

    // End the test
    await eyes.close();
  });

  afterEach(async () => {
    // If the test was aborted before eyes.close was called, ends the test
    as aborted.
    await eyes.abortIfNotClosed();

    // Wait and collect all test results
    const allTestResults = await runner.getAllTestResults();
  });
});
From the code above you can notice a simple visual automation test by using the power of Applitools. Let’s start from the beginning.
First, we import the @applitools/eyes-protractor module in our test. Then we initialize the Classic Runner, the eyes SDK, and the Configuration from that module. In the beforeEach() method there are three important steps that are needed to be done. First, we need the API key, either set it as an env variable or directly hardcoded in the test by using conf.setApiKey(‘APPLITOOLS_API_KEY’);
Then you need to set your Batch name as a collection of multiple tests which you can use it to organize your tests or if you don’t provide the batch name then the batch name of a test is the test name. This is done by using conf.setBatch(new BatchInfo(“This is a simple batch”));
After we finish setting the initial configuration, then we’re ready to pass that configuration to the eyes SDK by setting eyes.setConfiguration(conf);
With eyes.open() method we start a test before any checks are made. This method accepts several parameters. The webdriver, application name, yet name and the viewport size which in this case is 1280×720. This can also be set from the configuration using conf.setViewportSize(1280, 720);. In the next step, we navigate to the Applitools webpage, then we arrive at the core of this tool which is the check() method. This method stores the screen on initial execution and compares the screens on the second execution and so on. In this case, we are checking the entire window by setting Target.window().fully(). There are other check methods that can be very helpful for some specific scenarios.
- checkElement() // Run e checkpoint on a specific element
- checkFrame() // Run e checkpoint on a specific frame
- checkRegion() // Run e checkpoint on a specific region
- checkWindow() // Run e checkpoint on the entire browser window
After finishing all the checks we close the test with this method eyes.close();
Up until this point, we are safe to say that we have written a simple visual test using Applitools features. If we want to make some tweaks or some additional checks just to be sure if some external issue affects our test like connection problems, server problems, etc. then we can use eyes.abortIfNotClosed(); set in the afterEach() block after every test. This method sets the test as aborted if the test aborts before invoking the close() method. If we want to get all the results and store it in a constant and maybe print them in a console later, we can use const allTestResults = await runner.getAllTestResults();
With that, we are finished writing our fully automated visual test that can be used as a part of the regression suite.
Conclusion
Applitools is a powerful software tool for visual automation. Many companies are focusing on the functional aspect of the application and often forget how visual errors are important and can affect your application UI and its potential customers. If you decide to start testing for visual bugs manually, then I suggest going for it.
It can be very helpful to learn the concept behind visual automation but if you found yourself in a situation where the application is getting larger and more complex and you clearly see that there are many pages to be checked on different browsers and devices, then switching your manual efforts into very powerful visual automation testing tool like Applitools, it will help you and the organization that you work in immensely.
Share this post


